The allure of a rich, creamy cheesecake is undeniable, but the thought of turning on the oven can be a deterrent, especially during warmer months. Enter the magnificent oreo cheesecake no bake – a dessert marvel that combines the beloved crunch of Oreo cookies with a velvety smooth, melt-in-your-mouth cheesecake filling. This isn't just an easy dessert; it's a culinary triumph that promises impressive results without the stress of baking. But how do you ensure your no-bake creation is not just delicious but also beautifully stable and irresistibly dreamy? The secret lies in understanding a few key principles and techniques that elevate this simple recipe into a show-stopping masterpiece.
Whether you're celebrating a birthday, hosting a holiday gathering, or simply craving an indulgent treat, a well-executed Easy No-Bake Oreo Cheesecake: Perfect Stress-Free Dessert is always a crowd-pleaser. Forget the cracked tops and water baths of traditional baked cheesecakes; with a no-bake version, stability and creaminess are achieved through smart ingredient choices and proper chilling. Let's dive into the essential tips for mastering this delightful confection.
The Foundation of Flavor: Mastering the Oreo Crust
Every exceptional cheesecake begins with a stellar crust, and the no-bake Oreo version is no exception. This isn't just a base; it's an integral part of the dessert's flavor and texture profile, providing that satisfying contrast to the creamy filling. A stable crust is the bedrock of a perfect slice, preventing crumbling and offering a sturdy foundation.
- The Whole Oreo Approach: Unlike some crusts that use only cookie wafers, the beauty of an Oreo crust is utilizing the entire cookie, cream filling and all. The filling contributes to the overall richness and helps bind the crumbs together.
- Achieving Fine Crumbs: For the best texture and binding, your Oreo cookies need to be pulverized into fine, even crumbs. A food processor is your best friend here, quickly transforming whole cookies into a sandy texture. If you don't have one, placing cookies in a sturdy Ziploc bag and crushing them with a rolling pin works too, though it might require a bit more effort to achieve consistent fineness.
- The Melted Butter's Role: Unsalted melted butter is the magic ingredient that transforms loose crumbs into a cohesive crust. It acts as the glue, binding the Oreo particles together. Stir it in thoroughly until the mixture resembles wet sand. This visual cue is crucial – too dry, and it will crumble; too wet, and it can become greasy.
- Pressing for Perfection: Once mixed, the crumb mixture needs to be pressed firmly and evenly into your chosen pan. A 9-inch springform pan is ideal for easy release, allowing for those picture-perfect slices. If using a regular 8x8-inch square dish, line it with parchment paper, leaving an overhang on the sides. This "sling" makes lifting the cheesecake out incredibly simple. Use the bottom of a flat-bottomed glass or measuring cup to firmly compact the crumbs, ensuring a tight, stable base that won't fall apart when cut.
- Initial Chill: Don't skip chilling the crust for at least 20 minutes while you prepare the filling. This initial chill helps the butter solidify, setting the crust and preventing it from becoming soggy once the filling is added.
Crafting the Creamy Dream: Secrets to a Stable Filling
The heart of any great oreo cheesecake no bake is its filling – an impossibly smooth, lusciously creamy, and delightfully stable mixture. Achieving this dreamy texture requires careful attention to ingredients and technique. Here’s how to master it:
Ingredient Deep Dive for Unrivaled Stability
- Full-Fat Cream Cheese is Non-Negotiable: This is arguably the most critical ingredient for a stable no-bake cheesecake. Opt for high-quality, full-fat cream cheese, such as Philadelphia. Its higher fat content provides the necessary richness and structural integrity, allowing the cheesecake to set firmly. Lower-fat versions often lead to a softer, less stable result that can be disappointing. Ensure your cream cheese is softened to room temperature for easier, lump-free mixing, but not warm or melted.
- Powdered Sugar for Smoothness and Structure: While granulated sugar works in baked cheesecakes, powdered sugar (also known as confectioners' sugar) is essential for no-bake versions. Its fine texture dissolves instantly, preventing any grittiness. Crucially, powdered sugar often contains a small amount of cornstarch, which acts as a stabilizer, helping the filling set beautifully without baking.
- The Essential Vanilla Extract: A touch of good quality vanilla extract enhances all the other flavors, adding warmth and depth to the filling.
- Cold Heavy Whipping Cream: The Aeration Agent: This is where the "dreamy" mousse-like consistency comes from. Heavy whipping cream, whipped to stiff peaks, incorporates air into the filling, making it light, fluffy, and firm. It's vital that the cream is ice cold when you whip it – this helps it whip up faster and hold its volume better. Use an electric mixer to achieve stiff peaks, where the cream holds its shape when the beater is lifted. Be careful not to over-whip it into butter, but under-whipped cream will result in a runny filling.
Mastering the Mixing Technique
- Cream Cheese Base First: In a large mixing bowl, beat the softened cream cheese, powdered sugar, and vanilla extract together with an electric mixer until the mixture is completely smooth, fluffy, and free of any lumps. This step ensures an even, silky base for your filling.
- Whip Cream Separately: In a separate, large, chilled bowl, whip your cold heavy cream until it forms stiff peaks. This careful separation prevents overmixing the cream cheese and ensures maximum aeration of the cream.
- Gentle Folding is Key: Once both mixtures are ready, gently fold the whipped cream into the cream cheese mixture. Use a spatula and a light hand, working in batches if necessary, to avoid deflating the whipped cream. This folding technique preserves the air bubbles, which are critical for the cheesecake's light texture and stability.
- Oreo Integration: Finally, gently fold in your roughly chopped or crushed Oreo pieces. Distribute them evenly throughout the creamy filling. The goal is to incorporate them without overmixing, which could lead to a denser texture.
If you're an ultimate Oreo lover craving that rich, smooth experience, our article on Creamy No-Bake Oreo Cheesecake: The Ultimate Oreo Lover's Treat offers even more tips for maximizing that irresistible cookie flavor.
The Waiting Game: Chilling for Perfection and Presentation Prowess
You've meticulously prepared your crust and crafted your creamy filling. Now comes the most challenging, yet perhaps most important, step: the wait. Proper chilling is absolutely essential for your oreo cheesecake no bake to set beautifully and achieve that stable, sliceable consistency.
- Chilling is Non-Negotiable: After spooning the filling over your chilled crust and spreading it evenly, cover the pan tightly with plastic wrap or foil. This prevents the cheesecake from absorbing any refrigerator odors and protects it from drying out. Then, refrigerate it for a minimum of 6 hours. However, for the absolute best results – a perfectly firm, easy-to-slice cheesecake – chilling it overnight (12+ hours) is highly recommended. During this time, the fats in the cream cheese and heavy cream solidify, and the powdered sugar's stabilizing properties take full effect, transforming the liquid mixture into a stable, sliceable dessert.
- Removing from the Pan: For springform pans, once fully chilled, carefully run a thin, sharp knife around the edge of the cheesecake before releasing the spring mechanism. This helps ensure a clean, smooth side.
- Clean Slices Every Time: To achieve picture-perfect slices, use a sharp knife that has been run under hot water and wiped dry between each cut. The warm blade glides through the creamy filling, preventing dragging and mess.
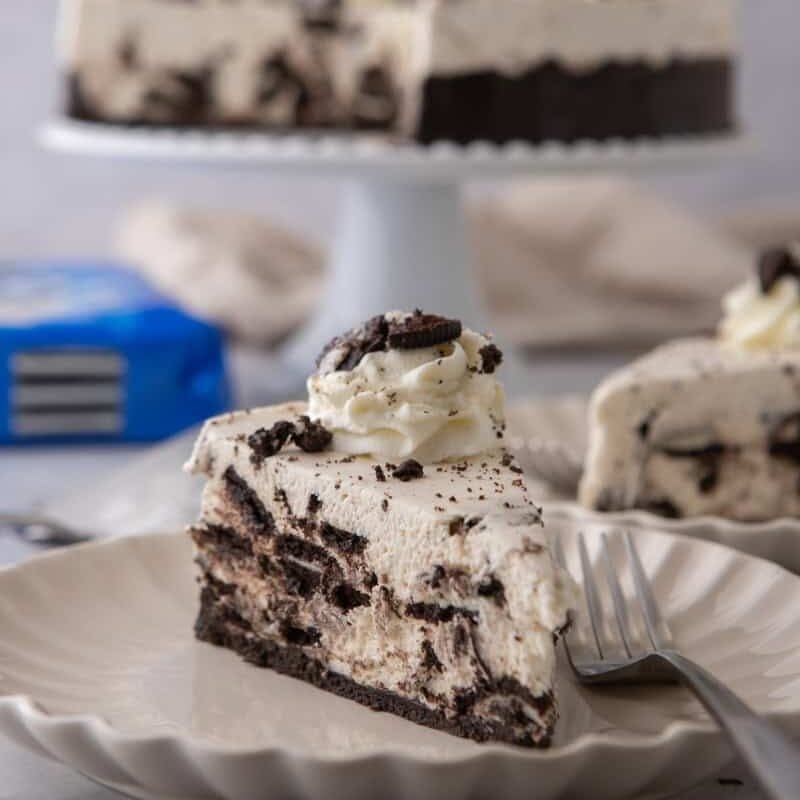
- Presentation is Key: While the cheesecake itself is stunning, garnishing adds that final touch of elegance and visual appeal. Before serving, pipe or spoon additional homemade whipped cream around the edges or dollop it onto individual slices. Finish with whole or crushed Oreos, chocolate shavings, or even a drizzle of chocolate sauce for an extra touch of indulgence.
- Make-Ahead & Storage: One of the greatest advantages of a no-bake cheesecake is its make-ahead friendly nature. You can prepare it a day or two in advance, making it perfect for entertaining. Store any leftovers tightly covered in the refrigerator for up to 3-4 days. For longer storage, slices can be frozen individually on a baking sheet until firm, then transferred to an airtight container or freezer bag for up to 1 month. Thaw in the refrigerator before serving.
Troubleshooting Common No-Bake Cheesecake Woes
Even with the best intentions, sometimes things don't go exactly as planned. Here are some quick fixes and preventative measures for common issues with your oreo cheesecake no bake:
- "My cheesecake is too soft/runny!" This is often due to insufficient chilling time, using low-fat cream cheese, or not whipping the heavy cream to stiff enough peaks. Ensure you're using full-fat ingredients and allowing ample time in the refrigerator (preferably overnight). If it’s slightly soft after a long chill, try freezing it for 30-60 minutes before serving.
- "The crust is crumbling!" This usually means there wasn't enough melted butter to bind the crumbs, or it wasn't pressed firmly enough into the pan. Next time, double-check the "wet sand" consistency and use the bottom of a glass to really compact the crust.
- "My filling is grainy!" This can happen if the cream cheese wasn't softened enough or if granulated sugar was used instead of powdered sugar. Always ensure cream cheese is at room temperature and stick with powdered sugar for that silky-smooth texture.
- "The cheesecake looks dull." This is an easy fix! Generous garnishes of whipped cream, extra Oreo crumbs, chocolate drizzles, or even fresh berries can instantly elevate its appearance and make it look as dreamy as it tastes.
Mastering the no-bake Oreo cheesecake is a delightful journey that combines simplicity with sensational results. By paying attention to key ingredients like full-fat cream cheese and cold heavy whipping cream, perfecting your mixing techniques, and allowing ample chilling time, you'll consistently create a stable, sliceable, and utterly dreamy dessert. This iconic treat is more than just a recipe; it's an experience waiting to be savored, proving that incredible desserts don't always require an oven. So, go ahead, gather your ingredients, follow these tips, and prepare to impress everyone with your perfectly set oreo cheesecake no bake masterpiece!
